

In this article I’ll run through how to get the most out of the teacher tools built into SightReader: creating a class, getting your pupils into it, setting them pieces, and checking who has actually practised before the next lesson.
Setting a class up takes about five minutes.
Before you start
You don’t need to be verified to try this. Mark yourself as a teacher under Account → Profile and the class tools appear straight away: classes, join codes, rosters and assignments.
Verification adds two things: Pro free, permanently, and the ability to send invitations by email from your account. Apply for a verified teacher account here. It’s a short form, and we usually reply within a day or two. Free Pro matters because you can’t sensibly set pieces you can’t open yourself.
1. Create a class
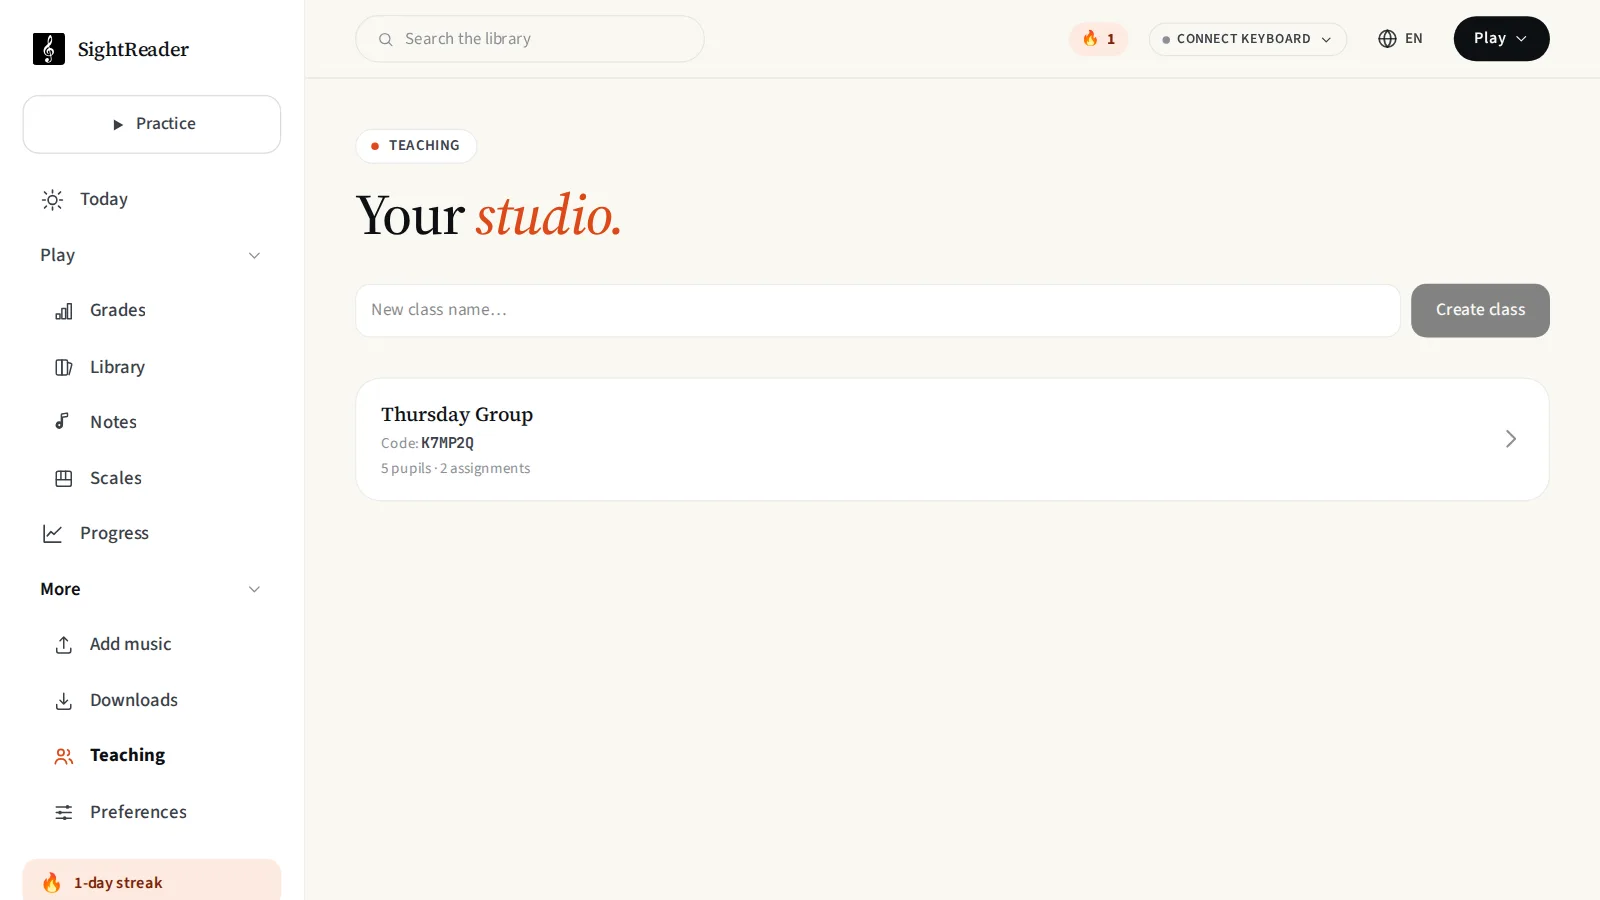
Teaching lives in the More menu. Type a name, press Create, and that’s it. A class is a name, a join code and a list of people.
Most teachers create one per teaching day or per group: “Thursday Group”, “Grade 3s”, “Monday afternoons”. If you teach entirely one-to-one, a single class called “My pupils” works fine. Nothing about assignments requires the pupils to be a group in any real sense.
2. Get your pupils in
There are two ways in.
The join code is six characters, which makes it quick to read out at the end of a lesson. Pupils go to the Join a class page, type it in, and they appear on your roster. There’s a copyable link that does the same job if you’d rather paste it into a group chat or an email.
Email invitations are the verified-teacher extra. Paste in a list of addresses, separated by commas or one per line, and each person gets an invitation with a join button. It works whether or not they already have an account. New pupils sign up through the link and land in the class afterwards.
The invitation is written to be forwarded, so if the address you have is a parent’s, that’s fine. They can pass the link on and it still attaches to the pupil’s own account.
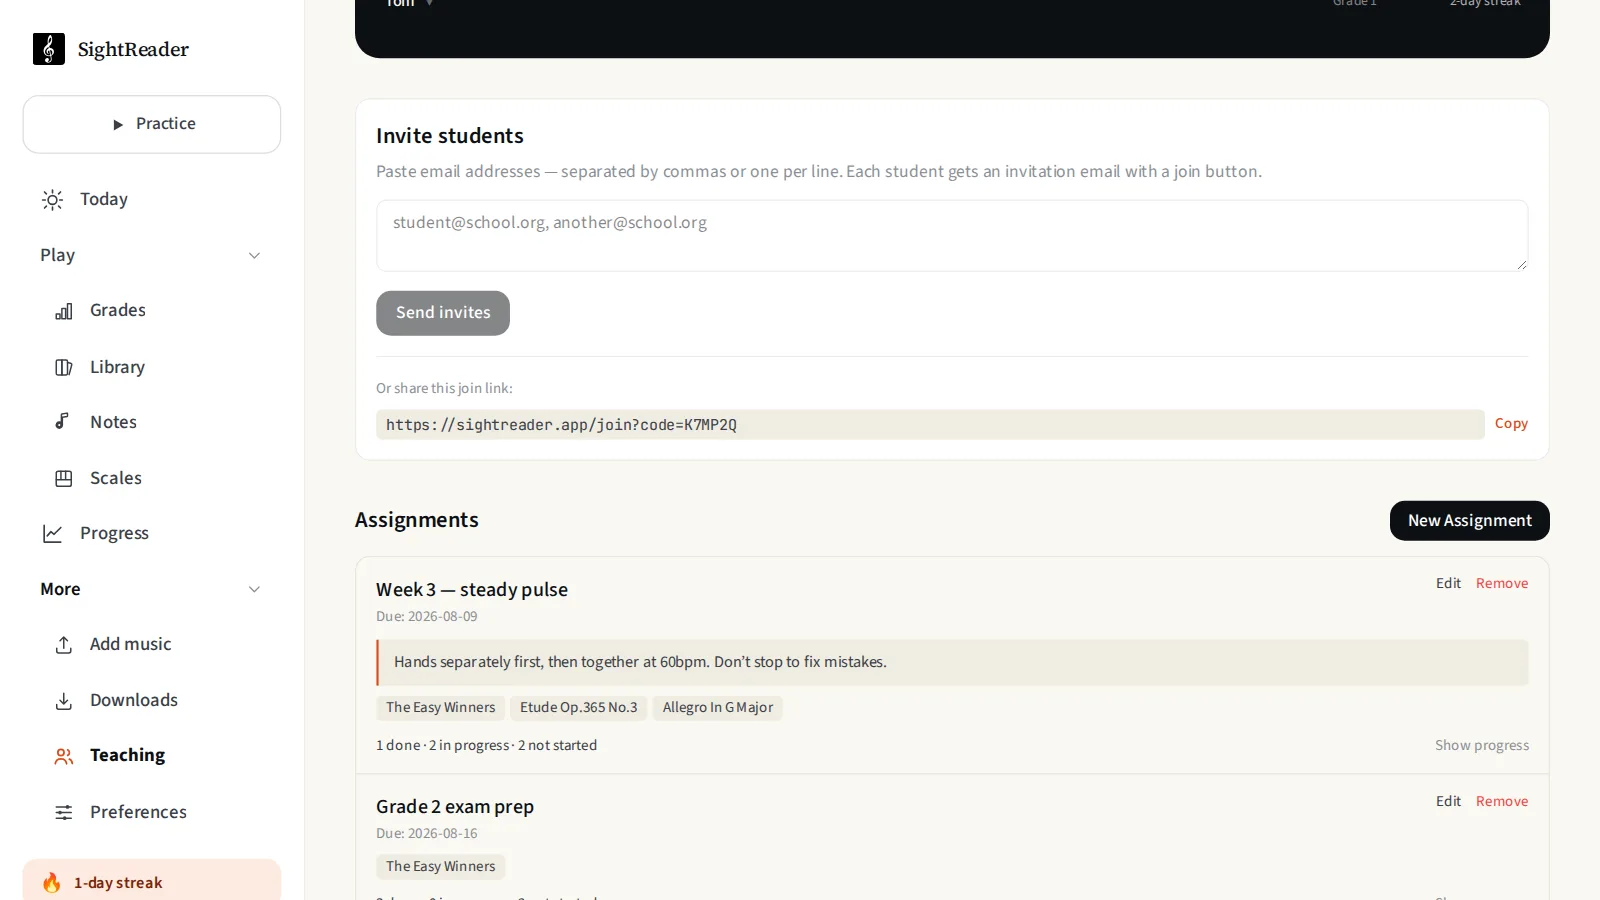
If an invitation bounces, the list tells you. Mistyped school addresses are common enough that it was worth building.
3. Read the roster
Once people join, the class card shows each pupil with their grade and practice streak. Tap a name to open their detail: when they last practised, sessions this week, average accuracy over the last month, the pieces they’ve been playing, and where they’re stuck. “Stuck” means anything they’ve attempted more than once and still not passed.
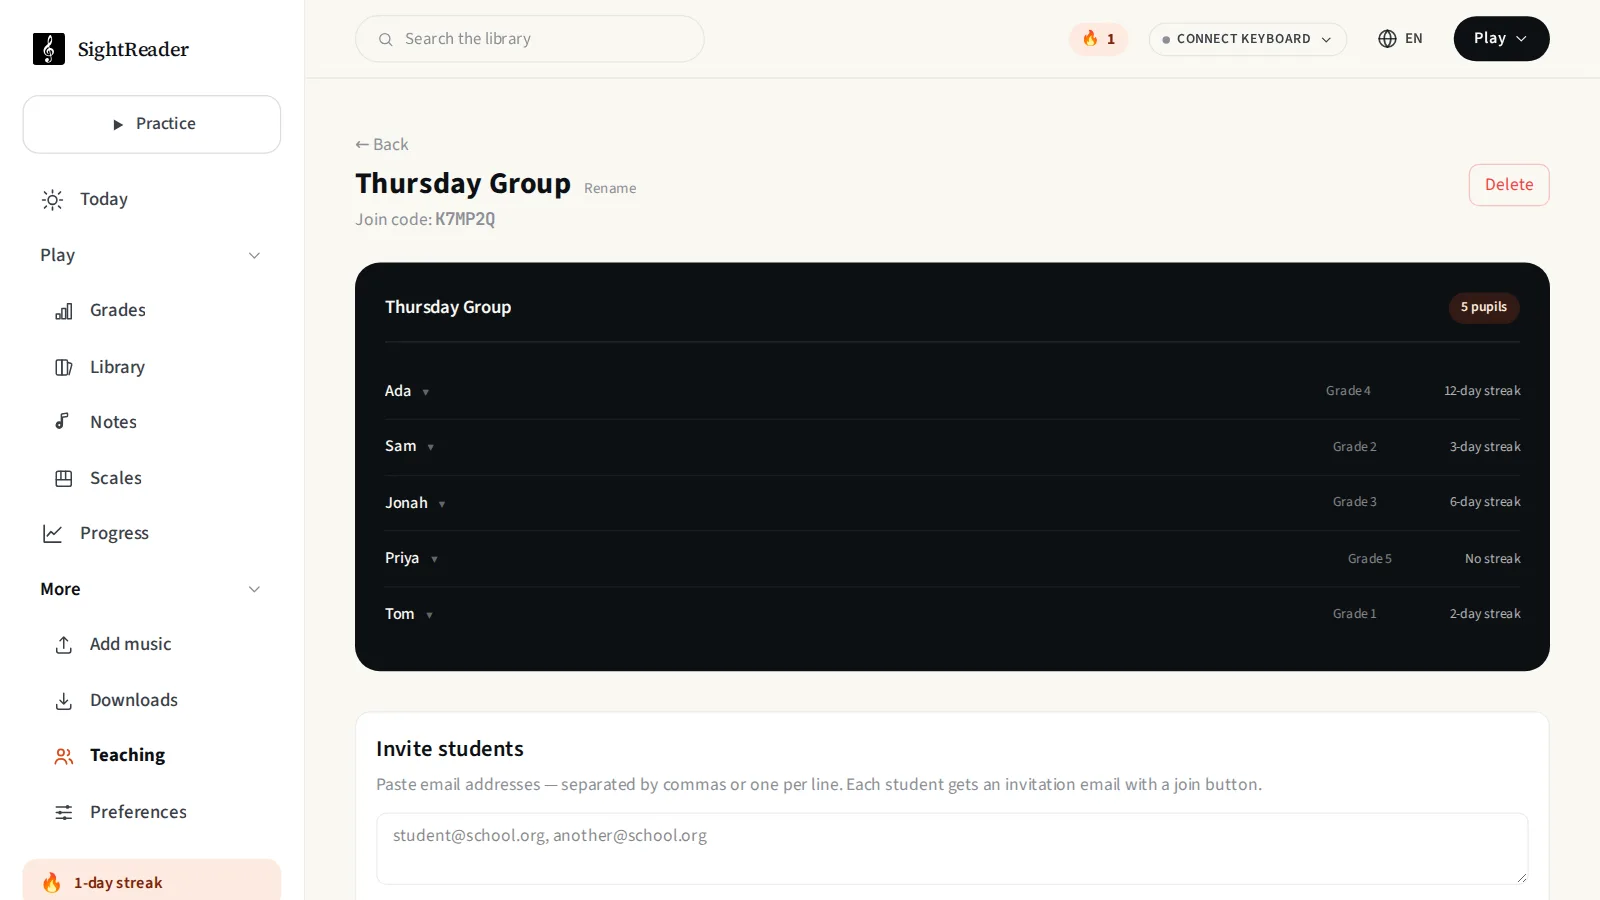
Worth saying plainly: only you see this. Pupils in the same class can’t see each other’s names, streaks or numbers.
4. Set the work
Press New Assignment. You’ll need a title and at least one piece. A due date and a note are optional.
Use the note. It’s the difference between a pupil seeing three pieces appear and a pupil knowing what you want from them. “Hands separately first, then together at 60bpm. Don’t stop to fix mistakes” is a lesson instruction that survives the week. Three untitled pieces are not.
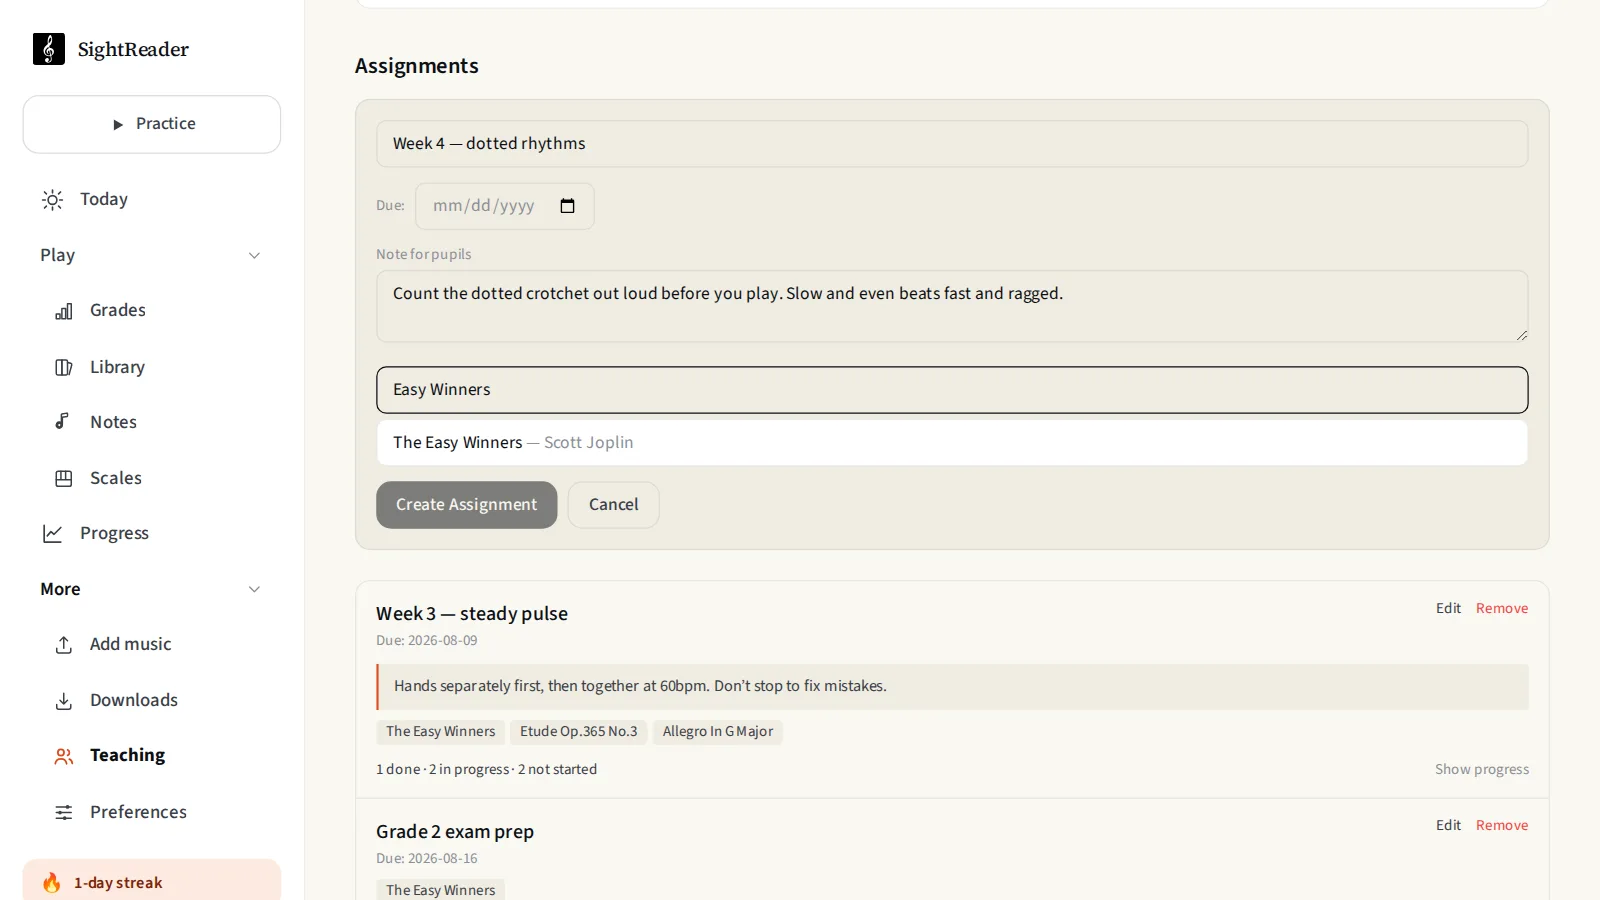
Search covers the whole library, roughly 3,700 pieces tagged by ABRSM grade, so you can set real repertoire rather than a generated exercise. Add as many pieces as you like to one assignment. Three or four is a sensible week.
Three things worth knowing:
- Due dates are soft. Nothing locks. An overdue assignment moves to the top of the pupil’s list and turns red, but it doesn’t disappear or stop counting.
- Assignments can be edited. Fix a typo, push the deadline back, swap a piece, all without deleting and rebuilding.
- Assignments go to a whole class. To set one pupil something different today, make them a class of one.
5. Check who has done it
This is the reason to come back to the page mid-week.
Every assignment carries a summary line: “1 done · 2 in progress · 2 not started”. Open it for the per-pupil breakdown, with the quietest pupils first, since those are the ones you might want to nudge.
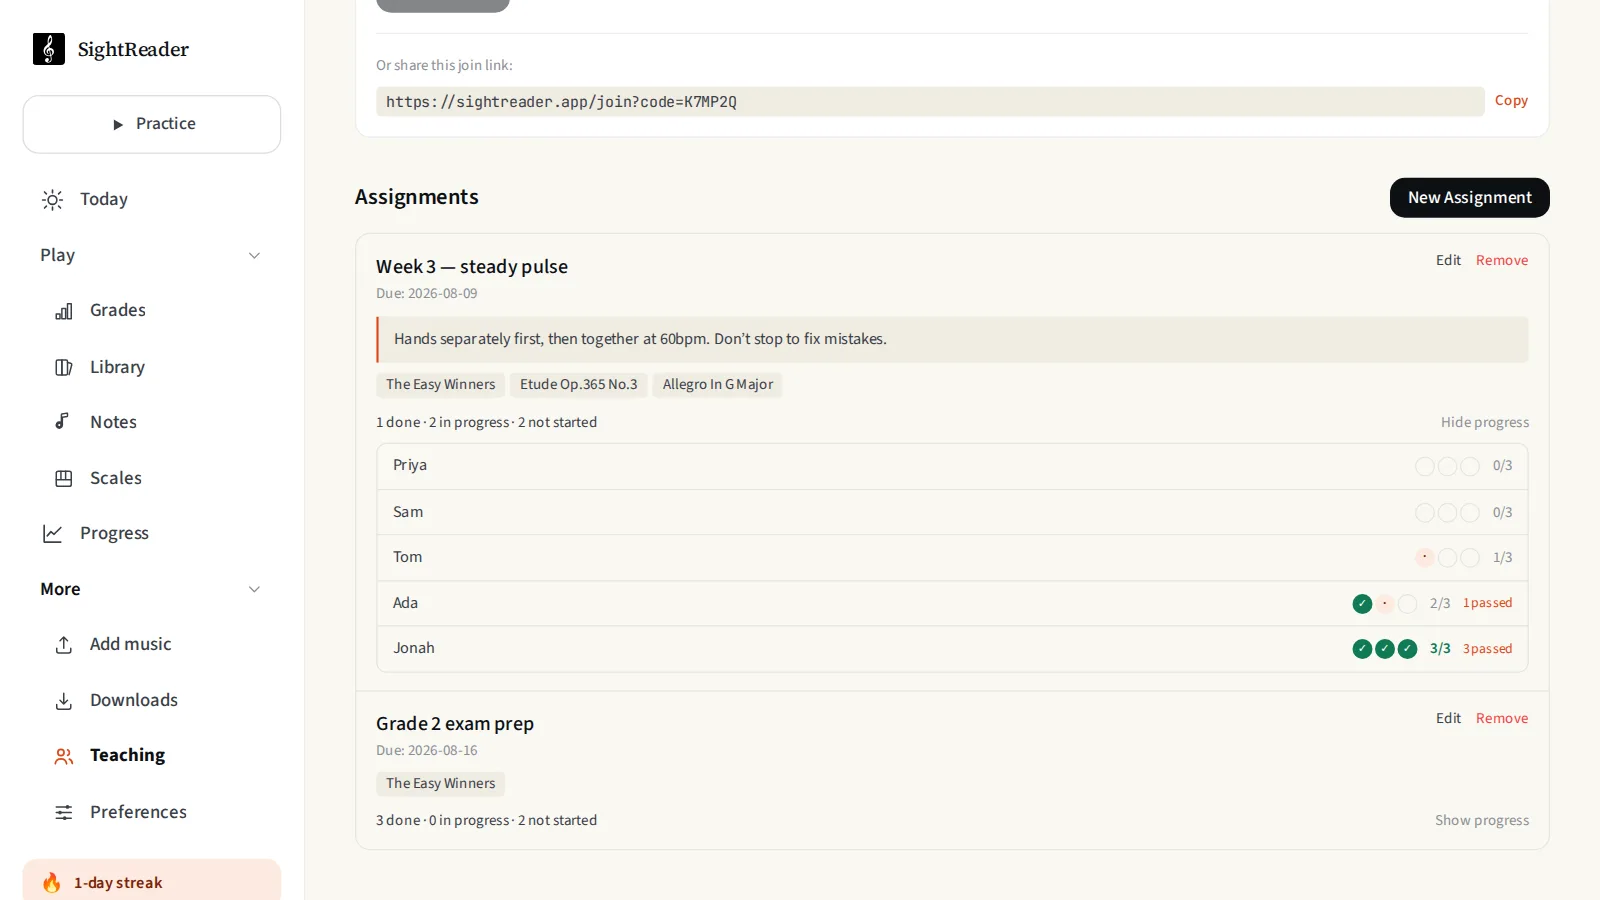
Each pupil gets one mark per piece:
- A filled tick means they passed it, at two stars or better (75% accuracy).
- A faint dot means they played it but haven’t passed it yet.
- An empty circle means they haven’t opened it.
The distinction between practised and passed is deliberate, because they prompt opposite conversations. A pupil who has played everything twice and passed nothing has done the homework and needs help. A pupil with five empty circles hasn’t done the homework.
You’ll also get a weekly email on Monday morning covering who practised, who didn’t, and where each assignment stands. There’s a toggle to turn it off under Settings → Teaching.
What your pupil sees
Worth knowing, because it affects how you word things.
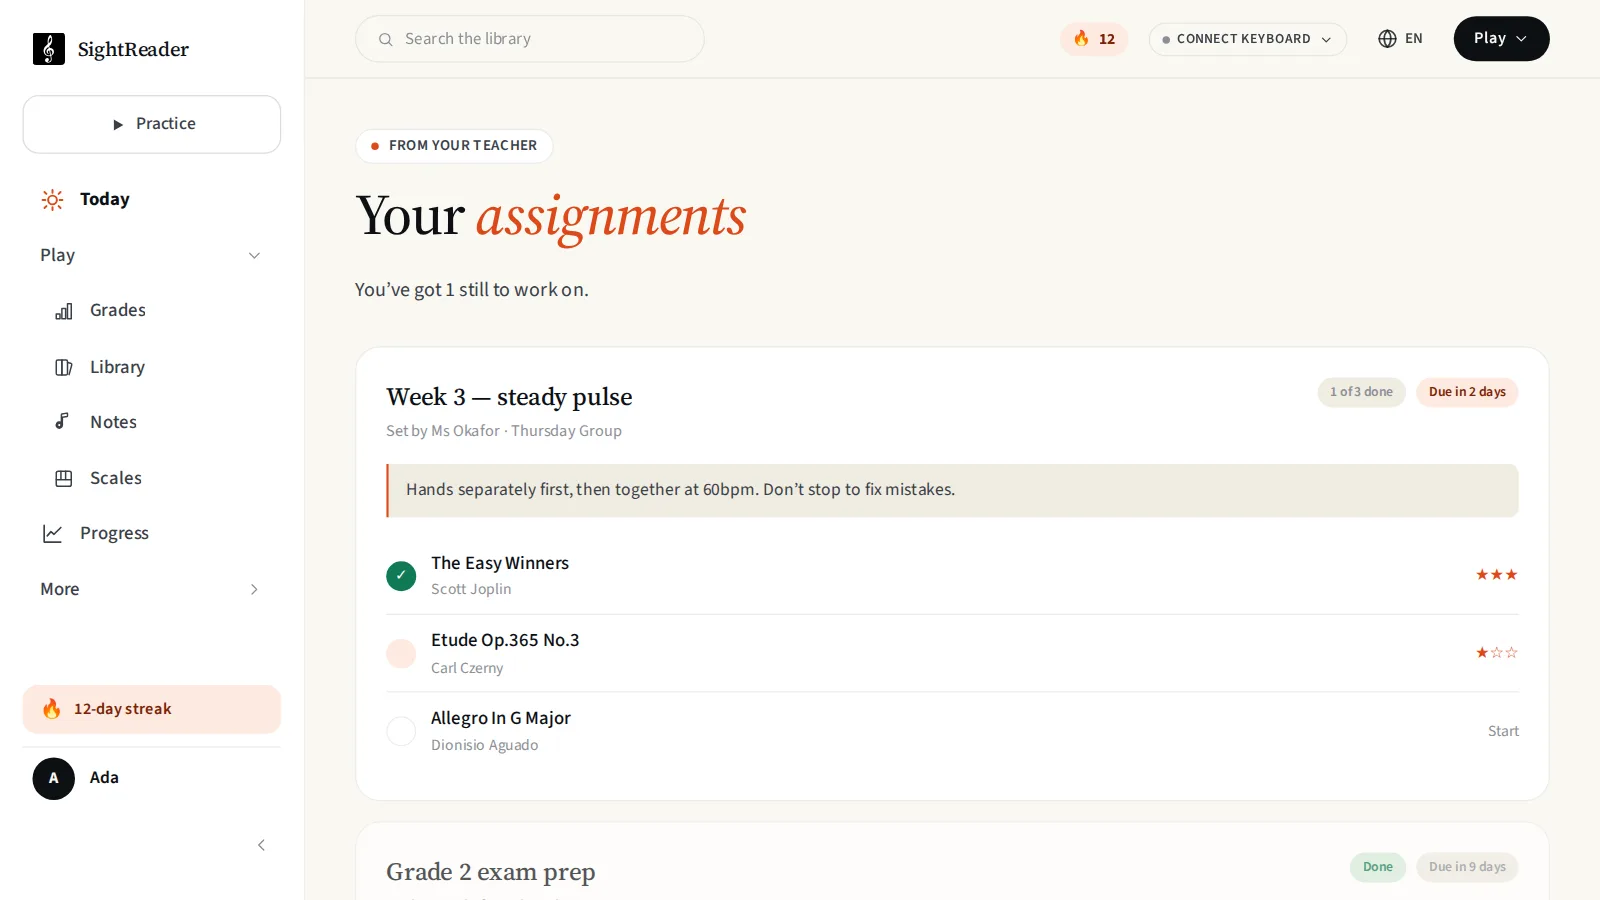
Your name is on it, along with the note and the due date. Each piece ticks off as they pass it, and the assignment moves to “Done” once they’ve got through all of them. The same work appears near the top of their daily practice, labelled Assigned, so it stands apart from the pieces the app picked itself.
One thing to watch when choosing pieces. The free tier covers 54 library pieces plus the first five levels of every grade to Grade 5. If you assign beyond that, a free pupil still sees the assignment, including the title, your note and the piece names, but can’t open the locked ones. They’re shown what Pro costs and offered a way to forward the details to whoever pays.
I’d rather tell you that here than have you find out from a pupil who couldn’t do the reading. If you’re setting work for a group who won’t be paying, such as a school or an outreach project, email us rather than working around it. We can issue codes for a whole class.
Getting started
If you already teach with SightReader, the class tools are in the More menu under Teaching. If you don’t yet, apply for a verified teacher account. It’s free, permanently, and there’s no card involved at any point.
If you use this for a term and something about it doesn’t work for you, reply to any email we send. The class system looks the way it does because teachers wrote in and told us the previous version didn’t answer the question they had.